Back to home page

Use Interactive Interface to Design and CODE ... 'Kaleidoscope Patterns'


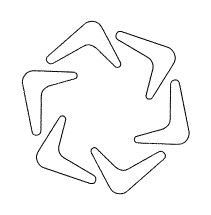
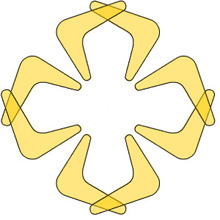
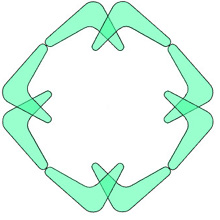
Code: 2B - 10E( f ) - Y
Code: 2B - 3B( f ) - Y

Code: 2B - 3B( f ) - R
Code: 2B - 1E( f ) - B
Code: 2B - 10E( f ) - B

Code: 2B - 9D( f ) - B


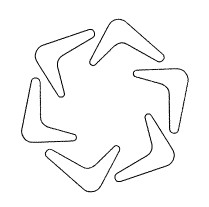
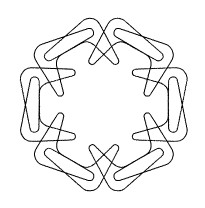
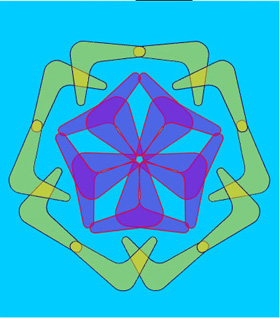
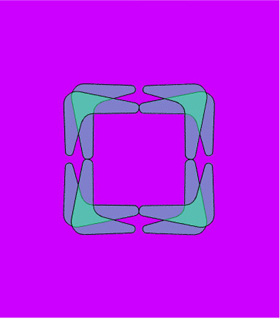
Examples of patterns designed using the 'Kaleidoscope Patterns Interface':


Hyperlinks ...

1. Patterns using DOTS and Shape 2B

2. Patterns using DOTS and Shape 2B ( Slide Show ... 1 - 12 )

3. Patterns using DOTS and Shapes from Disc A and Disc B ( Full version CD )

4. Patterns using DOTS and Shapes from Disc A and Disc B ( Slide Show ... 1 - 20 Full version CD )

5. How to color a composite pattern on 3 Layers

note:
Full version of the Interface is on the CD and includes all the shapes ( 13 ) on Disc A and Disc B
Each of the 3 Layers can select any shape from Disc A or Disc B


Features of the 'Kaleidoscope Pattern' and the 'Interface'

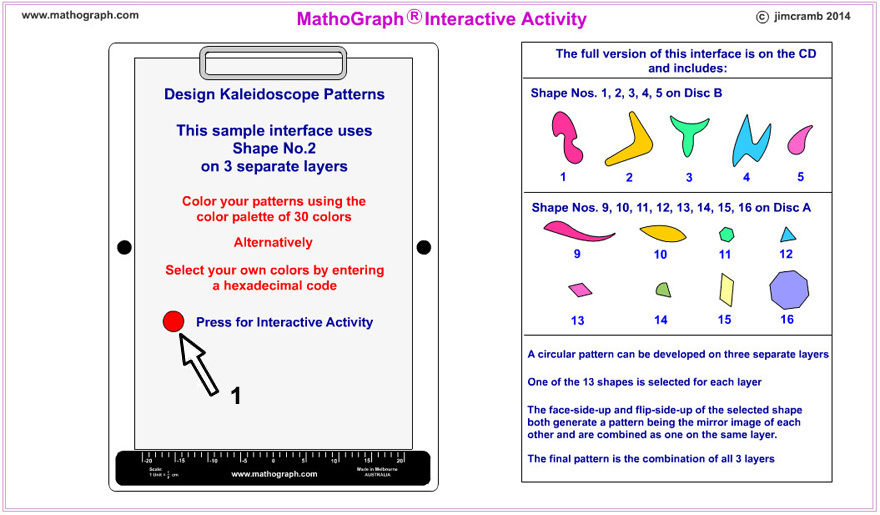
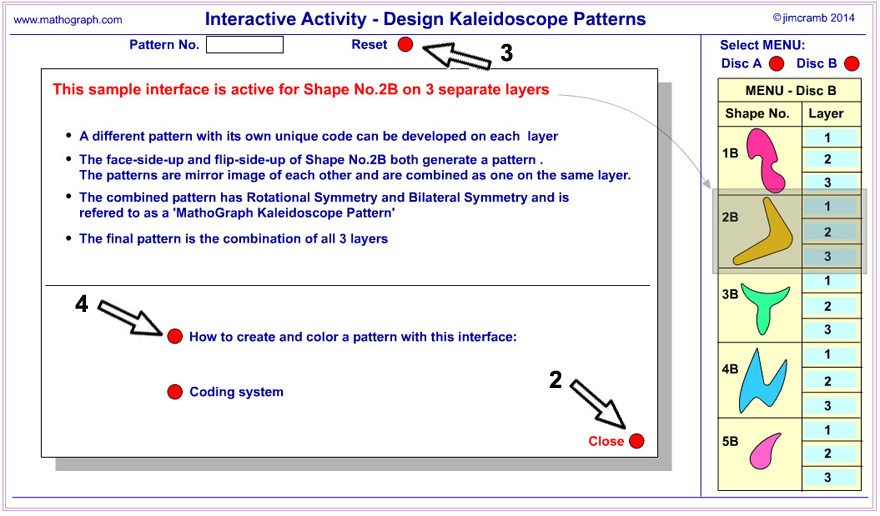
A Kaleidoscope Pattern is the combination of 2 patterns being the mirror image of each other

The 2 patterns use the same Shape ( face and flip ), Tooth Number, Slot Location and Movement

The 'Interface' combines the face and flip patterns on the same 'Layer'


Flip CODE: 2B -11Cf- R


Face CODE: 2B - 11C - R


CODE: 2B - 11C ( f ) - R

The difference in the CODES is that the Flip CODE includes 'f' in the Location ... 11Cf

The 2 codes can be combined and written as one code ... CODE: 2B - 11C ( f ) - R

The 'f' is written in brackets ( f ) and indicates that the CODE is the same for 'face' and 'flip'


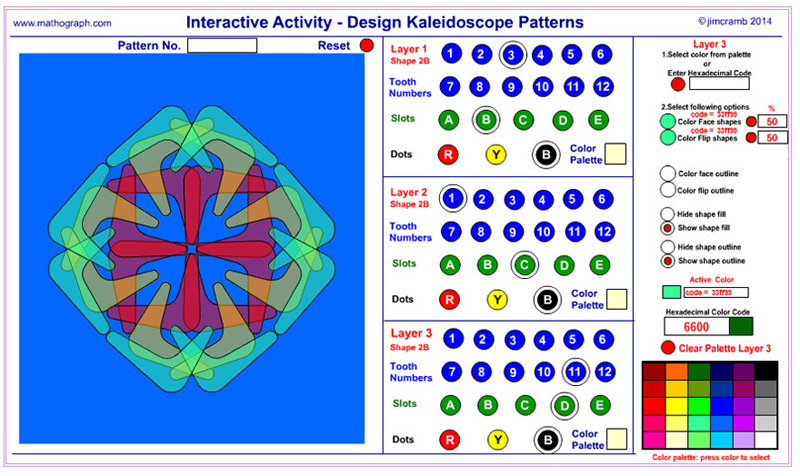
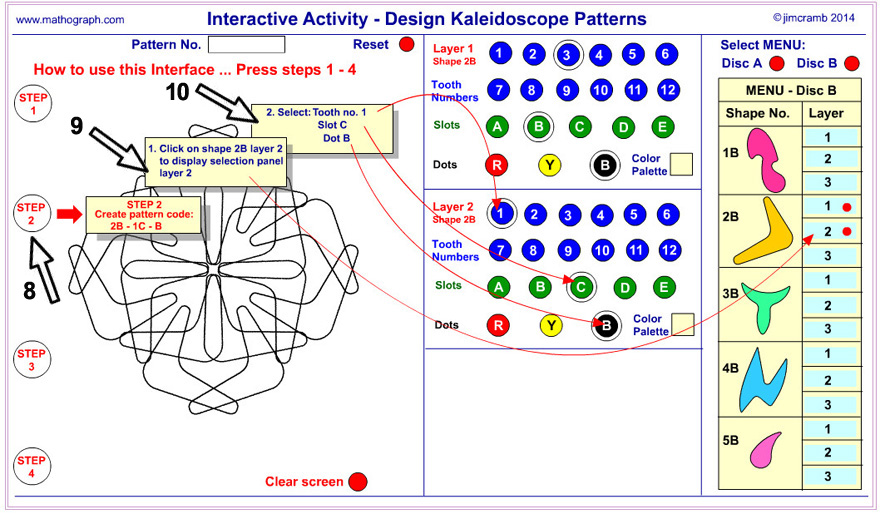
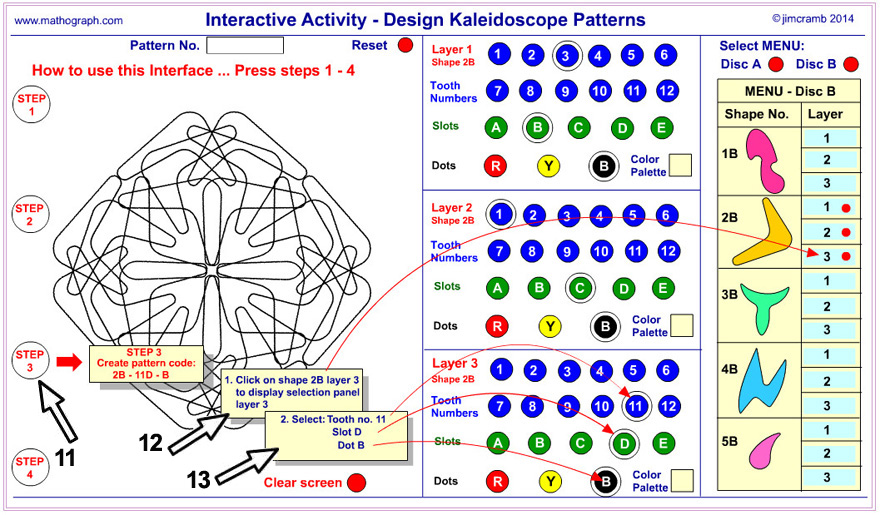
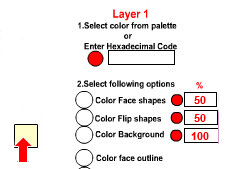
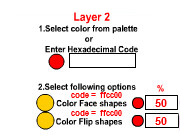
The Interface allows for 3 separate patterns to be designed and stacked upon each other


Layer 1


Layer 2


Layer3


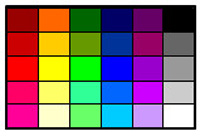
Each pattern is on its own 'Layer' and colors can be selected from a 'Color Palette' to color the shapes

A different color can be selected for the face and flip shapes and a background color for Layer 1

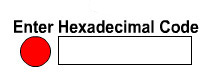
A 'Hexadecimal Code' can be entered in lieu of using the 'Color Palette'


The top 2 Layers ( Layers 2 and 3 ) are transparent

The final design is the combination of the 3 patterns

Each pattern can be adjusted for 'CODE, Color and Other Features' whilst still viewing the final design

To enlarge screen 'Right click on screen and select Zoom In'


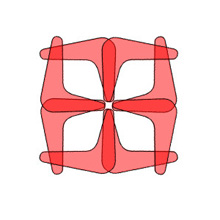
Example of the 'Kaleidoscope Interface' with the above 3 patterns entered at Layers 1, 2, and 3

Kaleidoscope Pattern

CODE
Matrix

2 B

3 B

B

2 B

1 C

B

2 B

11 D

B

LINK: This pattern will be achieved by following the Screen Shots ( 1 - 8 )


Interactive Activity - Design Kaleidoscope Patterns
This interface uses 'Shape Numbers. 1B, 2B, 3B, 4B, 5B' on 3 Layers


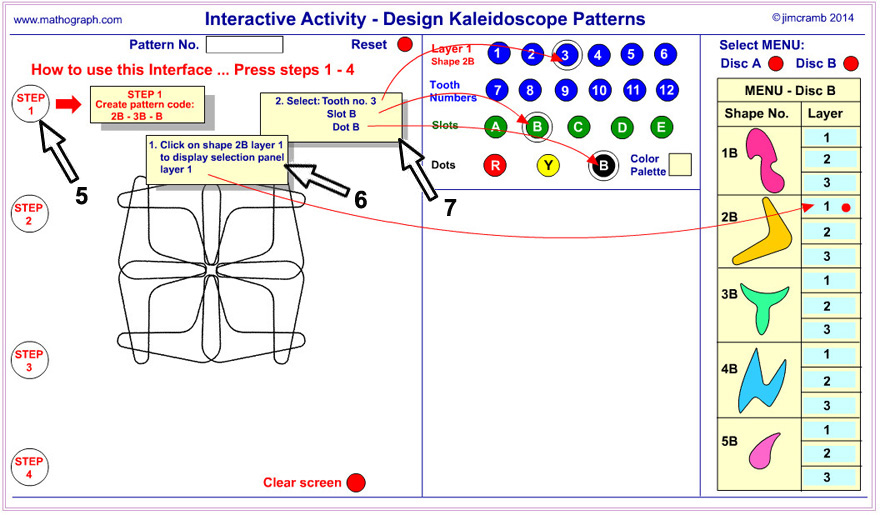
Tutorial using Active Interface:

Design Kaleidoscope Patterns using 'Shape 2B'on 3 layers and Color Palette

Some browsers may have difficulty in viewing this Interface
If you encounter any problems it is advised to use 'Internet Explorer Browser'

Follow the instructions as set out in the Interface and work with the Screen Shots ( 1 - 8 )

Start by selecting Screen 1 ... ( Screen Shot 1 )

Screen 1

Screen 2
Screen 3

Screen 4
Screen 5

Screen 6
Screen 7

Screen 8


The Screen Shots ( 1 - 8 ) below are provided to help clarify some of the features of the Interface

Screen Shot 1
Select button 1. ... Enter Interactive Activity
BACK to Interface


Screen Shot 2
Select button 2 ... Clear Screen to start new design
Select button 3 ... Reset the 'Interface' to this Screen
Select button 4 ... Go to 'How to use Interface ... Steps 1 - 4'
BACK to Interface


Screen Shot 3
Select button 5 ... Highlight steps to create pattern code
Select button 6 ... Select shape 2B on Layer 1
Select button 7 ... Select Tooth 3, Slot B, Dot B
BACK to Interface


Screen Shot 4
Select button 8 ... Highlight steps to create pattern code
Select button 9 ... Select shape 2B on Layer 2
Select button 10 ... Select Tooth 1, Slot C, Dot B
BACK to Interface


Screen Shot 5
Select button 11 ... Highlight steps to create pattern code
Select button 12 ... Select shape 2B on Layer 3
Select button 13 ... Select Tooth 11, Slot D, Dot B
BACK to Interface


Screen Shot 6
Select button 14 ... Show instruction ... How to color panel
Select button 15 ... Show Panel ...How to color your Kaleidoscope Patterns - Ref: Screen Shot 7
BACK to Interface


Screen Shot 7
Select button 16 ... Click on all steps ( 1 - 8 ) and follow instructions
Select button 17... Explore 'Other Features'
Select button 18... Close panel
BACK to Interface

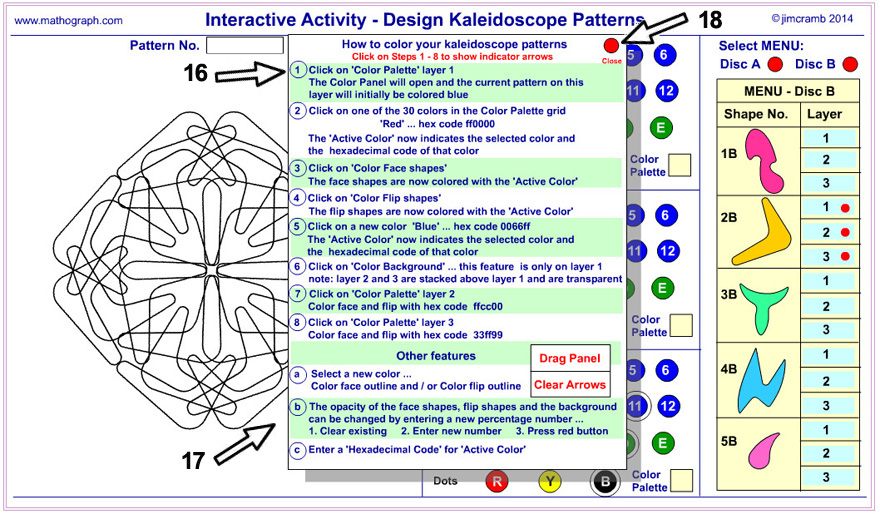
How to color your kaleidoscope patterns ... Instruction Nos. 1 - 8
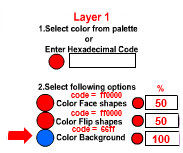
1

Click on 'Color Palette' Layer1
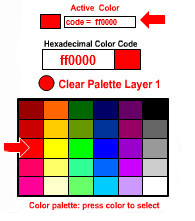
The Color Panel will open and the current pattern on this
layer will initially be colored blue

2

Click on one of the 30 colors in the Color Palette grid
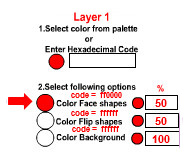
'Red' ... hex code ff0000
The 'Active Color' now indicates the selected color and
the hexadecimal code of that color

3

Click on 'Color Face shapes'
The face shapes are now colored with the 'Active Color'

4

Click on 'Color Flip shapes'
The flip shapes are now colored with the 'Active Color'

5

Click on a new color 'Blue' ... hex code 0066ff
The 'Active Color' now indicates the selected color and
the hexadecimal code of that color

6

Click on 'Color Background'
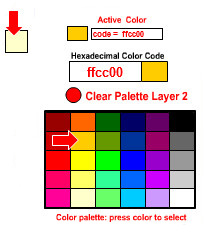
The background is now colored with the 'Active Color'
note:
The background feature is only on Layer 1
Layers 2 and 3 are stacked above Layer 1 and are transparent

7

Click on 'Color Palette' Layer 2

Select color ... hex code ffcc00

Color face and flip with hex code ffcc00
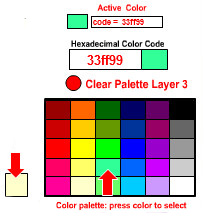
8

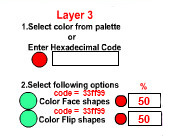
Click on 'Color Palette' Layer 3

Select color ... hex code 33ff99

Color face and flip with hex code 33ff99


Screen Shot 8
Colored pattern completed follwing Steps 1 - 8 ... Other features not added
BACK to Interface


Note:
The patterns at Layers 1, 2 and 3 can be changed by selecting different ...
Tooth numbers, Slot locations or Colored dots
The colors and other features will remain until changed

To hide a specific layer select the 'Clear Palette Layer' button
To access a specific layer select the 'Color Palette' button